Welcome to the RHUL Photography page

There are no rules for good photographs, there are only good photographs. - Ansel Adams

Sunday 21 November 2010

Photojournalism

‘I have been a witness, and these pictures are my testimony. The events I have recorded should not be forgotten and must not be repeated.’ - James Nachtwey

In a nutshell, the essence of photojournalism is having images that tell a news story. They will have a certain timelessness, objectiveness quality but ultimately a narrative. It is only natural then that war photography, natural disasters and human suffering has been prominent over the 100 years

At a first glimpse it is hard to really distinguish how photojournalism is distinctly different, for both can document people from a very candid situations, and both show society as its most honest and raw moments. However there are some differences between the two. Photojournalism is ‘reportage’ and the editors and publishers have control over what is published. A photojournalist may not have control over his photos, he/she does not have the ultimate say. He/she may shoot things that he thinks will be more likely to be published - rather than to what he thinks should be published. So, the real difference lies in the fact that (and I quote) ‘In the end street photography becomes how you see the world...’

I direct you to this video of a photojournalist, to give you an insight into his life

The Golden Age

The introduction of the Leica camera was what I think really gave life to Photojournalism. From the 1930s Newspapers/Magazines built up readership by the dominant use of photos. These include -Life magazine and the Daily Mirror. I would thoroughly recommend visiting http://www.life.com/ because they really do have the best photos of daily news stories!

Given the intense political situations and wars that have occurred over the last 100 years, it is understandable that photos would feature so heavily in the news. They could capture the life, the death, and the emotions of so many people. This and the rising interest in celebrities, which seems to dominate modern life, has meant some of the most iconic photos have been taken in this period. What's more was the photos were printed with the photographers name and so they became household names -something nowadays fewer photographers are obtaining I think.

Ethics of photojournalism

What are the things you have to consider when you are taking these kinds of photos?

Firstly take a look at this photo


You may recognise this, and you may know something about it. If you don't then take a couple minutes to ask your self these questions
1)What is happening in this photo?
2)Should the photographer have taken this photo/is it ethical?
3)Should the photographer intervened?
4) What would you have done?
5) Is there a greater cause that would justify this photo?

This photo was taken by Kevin Carter, but for the explanation, shall direct you to this video, and you will realise that not everything is clear cut as it seems. There is no straight answer...and it doesn't always end well for all involved.

http://www.youtube.com/watch?v=xDOxDRUNBBQ


So as a photojournalist you have to decide what to shoot, how to frame and how to edit your photos. You have to be sure of your role as a photographer. It is ultimately unfair to in a sense 'shoot the messenger' the photographer is there to show the world what is happening. If the world doesn't like what it see then that is not the photographer's fault. It is not the photographer's fault that there is famine in suffering the world, and even if they tried to help one person they have photographed, they cannot help them all. When Kevin Carter Committed suicide, part of his surviving suicide note, is harrowing, describing the things that would haunt him. I can't really imagine what it would be like seeing some of the things they see first hand.

However your role as a photojournalist has got to be honest, and not portraying things out of context or use manipulation. That includes digital manipulation or manipulation of the scene in front of them (something which has cause controversy, particularly with war photography) Editors can change something without your control, that it is the publication that should also take responsibility for ethics for the photos it chooses to print.

To look for photos that have made a major impact on the world then look here - but please be wary, some of these are not for the faint hearted.

http://www.digitaljournalist.org/issue0309/lm_index.html


http://news.bbc.co.uk/1/shared/spl/hi/pop_ups/05/in_pictures_50_years_of_photojournalism/html/12.stm


For the Guardian's take on photojournalism read this article here:

http://www.guardian.co.uk/artanddesign/2010/nov/16/criticism-critics-photography-susie-linfield

The death or rebirth of photojournalism?

New technology has made photojournalism much more accessible and widespread. If you think how difficult it was for early photographers to not just take photos, but to travel the world, then it was pretty exclusive. With small film cameras like the Leica, and the invention of DSLR coupled with widespread travelling it is not surprising photojournalism was taken on by many. Despite this, in the modern day it is a profession that has changed, it seems like is much harder to make it as a professional Journalist. When you are working freelance, spending you're life travelling, with competition from so many other photographers, you can see why it can be very difficult to become a photojournalist. However at the same time there will always be a need for striking photos, and with that a need for professionals to report on stories in order show the world what is happening. People may have thought that with the advent of photography that paintings would die out. However this is not the case. Photojournalism is arguably the most thought-provoking, harrowing, and important form of photography the world could have. That is why I believe there is no death of photojournalism, and why I have such respect for those who do endanger their life in search for the truth.

I always enjoy it at new year when the whole year is presented in photos by boston.com. Check out last years ones, they really are amazing!
http://www.boston.com/bigpicture/2009/12/2009_in_photos_part_1_of_3.html


The big names


Henry Cartier Bresson, 1908-2004
The father of modern photojournalism, I won't say too much about him because he deserves a whole post on his own!

Robert Capa, 1913-1954,
He is the co-founder of Magnum agency (which also deserves a post on its own) with Henry Cartier-Bresson and others.
He covered 5 wars, and tended to disregarded technical aspects of photography and went for dramatic photos
Check out some of his photos here on the Magnum site
http://www.magnumphotos.com/Archive/C.aspx?VP=XSpecific_MAG.PhotographerDetail_VPage&l1=0&pid=2K7O3R14YQNW&nm=Robert%20Capa

The quote that I put in at the beginning I found on James Nachtwey's website here:

http://www.jamesnachtwey.com/

His is one of the top current photojournalists, and the photos which you can see on his website are fully deserving of all the awards that he has won, especially when he has survived a grenade attack while in Baghdad.

For another modern photographer check out Steve McCurry's website

http://www.stevemccurry.com/main.php

There are many more, but here's the opinion of somebody else's
top 10 photojournalists check out this site:

http://www.digitalphotographybasics.com/the-top-10-photojournalists-of-all-time/

Featured Photographer – Ansel Adams

The negative is comparable to the composer's score and the print to its performance. Each performance differs in subtle ways.

Ansel Adams

It would hardly be worth discussing Landscape photography (or B&W photography) without mentioning Ansel Adams. Born in 1902 in San Francisco, his photos have become some of the most recognised and awe-inspiring landscapes ever taken. His most well known shots were taken at Yosemite National Park, California. Having visited Yosemite myself it is very easy why he came back time after time to take photos all year round. The park is home to some spectacular waterfalls, valleys and some of the oldest and largest trees in the world. In fact these Sequoia trees are up to 1800 years old and some are large enough to drive cars through the (removed) middle – which is what they have done. It is not hard to see how, with this type of scenery, Adams would have fallen in love with nature, hiking and taking photographing the beautiful vistas. In 1948, on reflecting on his first experiences of the Yosemite and nearby Sierra Nevada, he wrote:

“That first impression of the Valley – white water, azaleas, cools fir caverns, tall pines and stolid oaks, cliffs rising to undreamed –of heights, the poignant sounds and smells of the Sierra...was a culmination of experience so intense as to be almost painful. From that day in 1916, my life has been colour and modulated by the great earth-gesture of the sierra”

According to his biography on his website, it was 1927 which was significant marker in his photographic career. It was then that he took his first ‘fully visualised’ photos in Yosemite and flourished under the patronage of Albert M. Bender. It was soon after this that Adams began to flourish, and develop is style of ‘straight photography.’ The effect he was able achieve with this was that the ‘clarity of the lens was emphasized, and the final print gave no appearance of being manipulated in the camera or the darkroom.’ It was not long after this that he and fellow photographer - Edward Weston- founded the f/64 club, dedicated to this straight photography style.

Through the coming decades Adams attained a high level of notoriety and success, however beyond that, it was his technical ability that really set him apart. His love of theory and practical experience lead him to become consultants to major camera companies.There is much more to say on the life of Adams, but I feel that is his photographs that really do the talking, that show his skill and ability to, with clarity, convey the scenery around him. Ansel Adams lived until 1984, and left a huge legacy to the photographic world, I would say that he was a true master of his craft.

It has been recently thought that lost negatives are believed to those of Adams which were thought to be lost in a fire. Although the family have dismissed the photos (won't stand to make any money off them!) the negatives have been verified by experts. Read more here

http://www.bbc.co.uk/news/world-us-canada-10784539


Check out the Ansel Adams website here


Street Photography + the Law

"All photography is propaganda” – Martin Parr

Street Photography, a form of documentary photography, is essentially shooting photos of people in public places. The beauty of it is, is that the candid subjects are being captured to show something natural and unposed. The quality that I find in street photography is a certain rawness of reality, of the people shown, of a particular place, at a particular period of time. This is akin to holding up a mirror on society.

When you think of street photography you typically think of B&W photos, and despite the most classics ones having been taken between 1890-1975, it continues today to be one of the most interesting forms of photography go out and take, or the most evocative to view. In the past, the true greats have taken their photos with their 35mm Leica but nowadays street photography is being taken by everyone even with their camera phones – a phenomenon called iphoneography (see - http://www.iphoneography.com/ )

The challenges with Street photography are that you are shooting people on the move; things can unfold very quickly. You have to be able to capture the pace of everyday life, by using fast reactions and thinking to capture that great moment. This is why a simple set up of minimal equipment is key to street photography. Similarly what can be difficult is that you are not in a studio – you cannot control what is going on around you, and this candidness can be difficult and frustrating but at the same time can be so rewarding. Due to the fact that your subjects are the public, you have the question of permission to ask -shoot first, ask later? Or ask first then shoot? Or don’t ask for permission at all? There are certain advantages to all 3, such as if you’re asking them first they will be almost posing for you, but there really isn’t any right or wrong answer. However I would say this: let common sense prevail – avoid shooting people who don’t want to be photographed.
Taking photos with an SLR can be approached in two ways. What can be inconspicuous is the telephoto lens, which allows you to take photos of people from a distance, without them being aware that you are there. This means that the resulting shot is completely natural. Although it is up to personal preferences, this method of shooting may mean that you are slightly detached from the situation and are too far away and gives scope for more blurry photos the more you are zoomed in. I would say also that a longer lens can make you more conspicuous, kind of like the paparazzi.
The other approach which is also recommended is taking shots with a wide –angle lens, allowing fitting a lot more in, and taking some pretty nice street portraits. However you have to be much closer to your subject, and if you do consider it a downside, it means they will probably be aware of you taking the photo - although this may not matter in the end. Because I would consider being inconspicuous as possible is key.
I would say try the second approach, but ultimately do what you are comfortable with. Inconspicuousness is the key (not suspiciousness) shoot with minimal equipment. This is why in terms of film cameras; rangefinders are perfect for street photography. They are light, silent and inconspicuous – perfect for waist level shooting. Waist level shooting can give you an advantage over bringing the camera up to the eye mainly because people won’t be expecting it. They will not think you’re actually taking photos.
I would generally say don’t try to hide your camera and dress ‘normal.’ Find the scene, preset your camera (focus and settings) wait for the moment, bring your camera to shoot. I would say as events may unfold, shoot a lot so that you have more possibility of capturing that special moment. When taking your photos of people, one piece of advice that might seem trivial is to smile lots. I don’t know why, but it can do wonders if someone has noticed you taking a photo.

I would say that as street photography involves capturing people – you need to be up close and become a participant in the action. It often involves invading personal space so crowded events in big cities make good situations to shooting. Similarly at bigger events people are less likely to mind you taking a photo. If you were to take a photo of someone in a lift then they probably will mind you taking a photo, but in the context of a busy event people will not probably mind as much. I would also say, try and make your photo tell a story – and you might find that story in the photo only after you have taken it – otherwise having a photo which is open to interpretation is also great. Try sharper shots with higher ISO and faster shutter speeds and also blurred shots with slower shutter speeds. Most Street shots are B&W but never forget colour!
For more tips check here: http://digital-photography-school.com/20-quick-street-photography-tips

For me street photography doesn’t come easily – for you have to be quick, inconspicuous and your moment of opportunity to take a great shot may pass you within an instant. However when Garry Winogrand was asked how he felt about missing photographs while he reloaded his camera with film, he replied "There are no photographs while I'm reloading." This, a very optimistic way of viewing street photography is certainly true, for there are always more things to take pictures of even if you miss something. Garry Winogrand is considered to be a truly legendary photographer. So much so that he is famous for photos that he had never developed himself; when he died he left something like 2,500 rolls of undeveloped film, with a total of 300,000 unedited images. This is a staggering amount, I’ve read that he took about 10 rolls of film in one day, and with that amount I’m not surprised he got so many good shots. The photos of his Leica show that the image film has been worn on the the press plate of the camera – now that is crazy. See here: http://www.cameraquest.com/LeicaM4G.htm
I have also read this account of a workshop that someone took with Winogrand shortly before his death, this is a fascinating read! http://www.photogs.com/bwworld/winogrand.html I would also suggest you check out the flickr group dedicated in his style - http://www.flickr.com/groups/winogrand/
I would guess I am more used to taking time to compose a picture, making sure I have it right and after some time I will have my photo. I feel that Street photography has to be far more rapid and perhaps more intuitive, by following your instinct. After all, from all the quotes I have read from the big names, I get the sense they weren’t interested in the technical aspect, but merely taking good photos.
One aspect that you must be aware of is the Law, especially when taking photos on the street. I would firstly like to say that according to photographernotaterrorist.com that the law that has been causing to many problems is in fact suspended. So please read the next section which I wrote before this came into effect, just to be aware of what people had to go through and to know what your rights are should you for some reason get stopped.
"There is no legal restriction on photography in public places, and there is no presumption of privacy for individuals in a public place.”

Watch this video for a ridiculous example of the confusion cause by the terrorism act.
http://www.youtube.com/watch?v=Ea8m8DMvQ9I

Recently there has been much highlighted in the news about police abusing their powers and photographers being forced to delete their photos in the name of preventing terrorism. It is therefore important you should know your rights, if you were ever to find yourself in this kind of situation. The Terrorism Act 2000 is the law that you should be aware of – this is the one that allows the police to search you, but only if they have reasonable suspicion that you are a terrorist. It is important to note that professional photography is not allowed in Parliament square, Trafalgar square and all Royal Parks. However it is not an offence to take photographs of frontline uniform staff, and the act of taking a photo itself is not enough to warrant a stop & search. Similarly, if in a public place, people do not assume a right to privacy – although it is of course courteous to ask before taking a photo of someone. For further reading I direct you to http://photographernotaterrorist.org/

& http://www.urban75.org/photos/photographers-rights-street-shooting.html For a recent case, and an interesting read, check this article out:

http://www.independent.co.uk/news/uk/crime/officers-claim-they-dont-need-law-to-stop-photographer-taking-pictures-2012827.html

Tuesday 9 November 2010

Panoramic Photography


"The world just does not fit conveniently into the format of a 35mm camera"
W.Eugene Smith

Panoramic photography is a wide format form of taking photographs. You are using specialist equipment or a series of photos to convey an extended field of view. While there are no real formal divisions between wide angle, and panoramic, you could say that wide-angle refers to the lens you are using, but doesn't have to mean it is a panorama.

Panoramas are at least twice as high as they are wide (a ratio of 1:2), and are usually in the from of a long strip. Unfortunately these are usually quite frustrating to view on computers as they are generally not going to be able to fit the whole thing on screen, So I reckon they're best viewed in printed form, on the wall of an art gallery, although seeing it on a screen really allows you to zoom in on one aspect of the photo.

Th
e most common type is the stardard horizontal panoramas where you are capturing wide landscapes. You can also get Vertical ones, for example of skyscrapers. Although very compressed, and resized this photo <---- is a vertical panorama I took recently in Rome You can also get a clockwise panorama whereby you take a series of photos methodically in a clockwise fashion to build up a photo. There are also circular panoramas - where you take 360 degrees worth of photos and link the ends to form a circle - rather like this photo here -->


So what kind of equipment would you need for panoramic photography?! Well you can get hold of specialist equipment -cameras that rotate slowly and have an extended sensor but the majority of panormas are formed using a simpler method. If you have a 'fixed camera' like the Hasselblad Xpan then you would be able to take wonderful panoramas.

With the advent of digital technology and photo-editing software people are now able to seamlessly 'stitch' several photos together to form one panorama. The great thing with this is that you can even just have a simple compact camera to do this - they often come with software/settings that can aid you in taking panoramas.

Tripod can be very useful - but are not essential. If you want to get a very precise panorama - particularly if you're shooting in 360 degrees then you will want to use one so that the first and last photos line-up. You can also get special tripod heads that allow you to take panoramas more easily. but I think that you don't always need a tripod, and so long as you judge it right you can get a great panorama like this - you will probably have to do a little bit of cropping later on.

The sort of lens you use to take a panorama is really up to you. However taking photos with a wide-angle will mean you will need to take fewer over all - the only drawback is that everything will seem further away.

You should always try and overlap your photos by 30% in order to make sure your panoram turns out right and avoid putting key features in the overlapping area (although this is obviously sometimes unavoidable.)

You should avoid extreme lighting because this can cause a difference in light levels in your panoramas when they are stiched, making them very obvious that they are serparate photos. Photo-editing software however will sometimes correct this and make the scene look even.
So you should try and keep your photos even
, get the correct exposure over all of your photos. One tip that could help you if you're using a DSLR is to use the AE-L (autoexposure lock) to help you.

I find the easiest way to stitch photos together is to use Photoshop (file --> automate --> photomerge

But a dedicated program like Autostitch would work very well, all though you have to pay for it:
http://cvlab.epfl.ch/~brown/autostitch/autostitch.html

Hugin is one that I have used before - it takes a little getting used to, but it does the job!
http://hugin.sourceforge.net/

Panotools (free) is another one, but i havent used it myself. http://sourceforge.net/projects/panotools/

Theres also Pandora plugin for GIMP http://www.shallowsky.com/software/pandora/
but again i haven't used that either

Thursday 21 October 2010

Landscape Photography

‘There are no rules for good photographs; there are only good photographs’ –Ansel Adams
Landscape photography I have always felt to be something very intuitive and a natural thing to grasp. For example, being on a holiday and seeing a great natural vista, it’s obvious what should be photographed, and most of the time I feel the beauty of the scenery has done all the work for me. Ansel Adams said once that there are no rules for good photographs; and this encompasses the intuitive nature of taking (landscape) photography.

However it is certainly beneficial to learn the tips and tricks before you choose to disregard them if you choose to. Learning techniques of composition can be extremely beneficial when deciding how to take a photo.

First of all, landscape photography utilises the scenery as the subject; few animals or people will feature in the shot, unless perhaps they are used for scale, or are in the distance. Landscape photographs are not merely confined to that of the sea coast of mountains but there are urban landscapes you can take pictures of too.
I’ve read about different of styles of landscape photography, and the most common is representational ¬– whereby you are showing what you can really see.

The other interesting style is abstract landscapes whereby ‘shape and form take priority’ and the result is patterns unrecognisable as a conventional landscape. I managed to find this photographer called Steve Friedman who has managed to take some great landscape shots that have a feel of an impressionist painting. See them here http://tiny.cc/vmr89

So, onwards to the top tips of taking landscapes, and one of the most important should surely be the composition of the scene that you are taking. Now as with many opportunities to take a good photo, the likelihood is that someone else has taken the shot before you. What’s more is that anyone can take a snap at something, but the longer you spend composing a picture, then it is likely the outcome will be far better.
The ‘Rule of Thirds’ is the most well known idea people use in their composition. It might seem a little complicated to explain, but I assure you, once you start taking photos with this in mind, you will see better and results, and what is more I find that using this and any other technique of composition becomes second nature. The theory behind it is that you split your scene in the thirds (and therefore into 9 squares.) If you use this grid as a basis for your photograph, you can then place interesting objects over the intersecting lines.

The reason why you do this is because the centre of the picture is the weakest part of the picture that the eye is drawn to. If you place the interesting object just off to the side, then the viewer’s eyes will naturally fall onto this, and in turn make the picture more aesthetically pleasing. It helps make your photos be more natural and balance. It’s quite tricky to explain this in writing so I direct you to a video that can explain it further: http://www.youtube.com/watch?v=OiYHT-JvoqI

Leading lines can also be a useful compositional idea, and one that will draw your viewer to look at your photograph in a certain way. Leading lines, whether curved or straight, can control your viewer’s eyes to a certain focal point in the picture. They can be natural – for example shorelines, streams or fallen branches or they can also be man-made – like railway lines or roads.
Having depth in landscape photography doesn’t just mean having everything in focus (by using a deeper depth of field.) It also means adding perspective to a photo. This is generally achieved by adding foreground interest to the photo. If you were taking a photo of some mountains, having a flower, or rock in the foreground can help give the viewer a sense of magnitude to the whole scene; a tiny flower & a gigantic mountain. It is things like this add perspective to a photo.

‘A good photograph is knowing where to stand.’ This is apparently another quote by the great Ansel Adams, and this sums up the start of composing a photo. It is amazing the results you can get if you can take a photo from a different spot or even a different height. When composing your shot.

Using light to your advantage is really beneficial with landscapes. What is great is that you don’t even have to have good whether to shoot in this style. Generally the best time to use the light is during the ‘Golden hours’ – during sunrise and sunset. The sun during these times can turn the sky quite magical. On the other hand if it is bad weather, this too can help you get very atmospheric shots. Longer exposures can allow you to shoot the flowing of clouds, or the crashing of waves in a storm.

In terms of equipment, a tripod makes a great companion for taking landscapes. It may help you think more about what you’re trying to compose but more importantly it allows you take longer exposures. This means you can then capture the long flowing water in a stream or the swirling clouds above, which can really make the difference in a photo. Along with a tripod, a remote shutter release wouldn’t go amiss either. Zoom lenses make composing a shot very easy, but the lens which can produce fantastic results is the wide-angle. This is because they are able to fit more into the photo. The next step from this of course is to shoot panoramic photos. One of the ways of greatly improving your landscape photos is to shoot during the ‘golden hours’ – i.e. at dusk or dawn where you have some sort of ‘ magic light’ to shoot under. Read more about this here http://tiny.cc/r1409

I’ve read about the clichés of landscapes, please feel free to ignore this photographic snobbery. http://tiny.cc/r1409 Take it with a little pinch of salt but I think the main message is with landscapes is, don’t jump for the most obvious thing you can see, but take some time and try taking something that will be different and stand apart from many other landscape photographs.

More Links and videos here

http://digital-photography-school.com/11-surefire-tips-for-improving-your-landscape-photography
http://www.youtube.com/watch?v=xZ4nmxMlsg0
http://landscape-photography.suite101.com/article.cfm/using_lines_in_landscape_composition
http://www.smashandpeas.com/10-landscape-photography-tips/

Wednesday 6 October 2010

A Beginners Guide to Photography

A Beginners Guide to Photography

Whether you know nothing, or you know most things about cameras, I always find that I learn something new when I go back over the basics of photography.

I’ll firstly start off with types of camera. What most people associate with photography, or professional photography is film SLR or Digital SLR cameras. SLR means Single Lens Reflex, and is referring to the mechanism inside the body, which allows you to photograph exactly what you see through the viewfinder. What these cameras do very well is they give you the freedom and control over your photos to get exactly what you want – whether it is changing the lens or just a simple setting.


Compact and bridge cameras are probably what the majority of people are familiar with. They’re brilliant in that they are well priced, are getting hugely technological and can take some brilliant photos. I just find they break too easily. Bridge cameras are somewhere in between compact and DSLRs and are finding a rise in popularity since they do not have the huge price tag that DSLRs do.

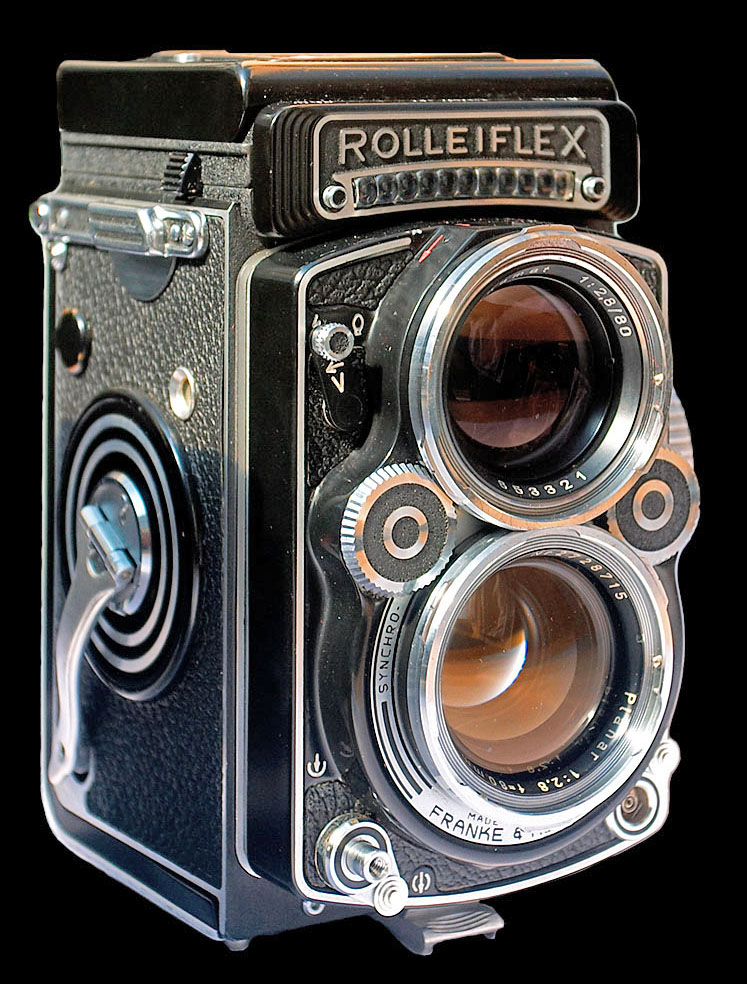
Twin Lens Reflex (TLR) cameras look very old fashioned in this modern day and age, but don’t be deceived, they take some of the highest quality photographs. They have two lenses, one which acts as the view finder and one that takes the photo. It does mean that what you see in the viewfinder is not what will be the final result. The reason why these take such high quality photos is because it is a medium format camera, meaning the film is going to be a lot bigger than a normal camera.

http://en.wikipedia.org/wiki/Twin-lens_reflex_camera

The Range Finder is another type of film camera popularised by street photographers and some of the greatest photographers of the last hundred years. Rangefinders allow you to measure the subject distance and accurately shots that are pin-sharp. It also means that you never need to actually look into viewfinder, making discreet street shots possible. As there is no working mirror, they are silent and less prone to vibration than SLRs are.

That is a general overview of the main types of cameras, there are of course other types, but those are the main ones.


If you are shooting digital then your image is captured using a sensor. On film cameras it’s simply captured on the film. There is more to it than just that because the size of your sensor can alter the quality of your photos. Different cameras use different size films and sensors. A typical film camera uses a 35mm format. Medium format cameras use film much larger called the ‘120’ film format. This gives negatives far larger than normal. In digital ‘full-frame’ cameras have a sensor size equal to that of the 35mm film format. However these cameras are extremely expensive and most DSLRs have a cropped sensor. Compact cameras will have an even smaller sensor. The impact on your photos is that the larger the film/sensor the higher the quality of your photos. There is a more in depth look at the impact of sensor sizes here http://www.cambridgeincolour.com/tutorials/digital-camera-sensor-size.htm

Lenses, they are the eye of the camera. Unfortunately if you have a compact camera then you pretty much can’t change the lens. I have seen bridge cameras which do have interchangeable lenses, these are very neat.

For a long time when I was starting out in photography, I wondered why my photos felt they looked the same’. It seems a little silly when I look back on it, but I realised, it was because I only had one lens. Different lenses give you a flexibility to shoot in all different kinds of situations, and they’re wonderfully made. In many ways they’re more important than the body of the camera. You also get what you pay for in terms of quality with your lens. If you’re saving up for a new one, then wait that little while extra to get a better one, it will be better for the long run.

There are two types of lens – Prime lenses & Zoom Lenses. Prime lenses have a set focal length, and it is because of this that, a 50mm lens is one of the most common produced lenses and also one of the cheapest. It is definitely my favourite lens to use. If you want to read more about why you should get a 50mm lens read here http://vothphoto.com/spotlight/articles/forgotten_lens/forgotten-lens.htm and if you want to see what kind of photos it can take then look here: http://www.sevenbyfive.net/photos/50-fantastic-photos-taken-with-a-50mm-lens/.

However zoom lenses are so useful, they save you the time of changing lenses or having to move to fit a subject in the photo. They are usually the standard lens that comes with most DSLRs. If anyone has ever gone out shooting for the day they will know how frustrating it can be missing a shot while changing your lens. Zoom lenses are very convenient, but they say because there is moving glass than camera quality is going to suffer slightly. Ultra-zooms are great for shooting things like wildlife or sports photography, allowing you to get right in close with the action.

So the type of the lens you have depends on its focal length, which is the distance from the lens to the film/sensor. It determines how much will be in view when you look through the viewfinder. Read more about different focal lengths here http://www.paragon-press.com/lens/lenchart.htm. The resulting ranges of lenses you get are: standard/wide angle/telephoto/macro and finally fisheye. If you want an in depth reading of all these different lenses and their applications read here http://www.dcresource.com/forums/showthread.php?t=8089

Now we shall get on to the more technical aspects of using your camera. Firstly I’d like to say that if you’re using a compact camera, there are many different modes that you can try and emulate some things of what you can do on an SLR. Sometimes they work beautifully, sometimes the settings aren’t very helpful (in my experience anyway) but as compacts get more advanced you can use them with more control than ever before.

Arguably one of the most key aspects is the aperture. It may take a few goes to understand (like it was for me) and apply it but eventually you’ll be able to control your aperture just the way you want it. Aperture is the adjustable opening in the lens. It is used to control the amount of light into the camera and ultimately what falls onto the film/sensor. Aperture is measured in F-numbers or F-stops; the larger the number the smaller the smaller the opening (aperture).

I’ll give you an example where controlling the aperture can come really handy. Say you’re shooting in low-light conditions, you’re outside and it’s getting dark. What I would do is change the aperture number to as small as possible, which in turn would open the camera up to as much light as possible.

Generally speaking I shoot in Aperture priority mode. This allows me to shoot with optimum shutter speed while controlling the aperture.

There is one other really huge reason why aperture is important, and that’s because it controls the depth of field.

Depth of field is all about how much is in focus in your picture, depending on how near or far the subject is. So the smaller the F-number - the shallower the depth of field. This means that I can take photo at F/1.8, have one flower in a bouquet in focus, yet all the others and everything behind look blurry. If I took the same photo with a deeper depth of field, i.e. higher F number then all the flowers in the bouquet will be in focus. I direct you to this youtube video which has a really good way of explaining this visually: http://www.youtube.com/watch?v=DieOQVj3UKw&feature=related

Understanding shutter-speed is fairly straightforward, but I will explain it anyway. Shutter-speed is how long the shutter is open for. This is measured in fractions of a second. Essentially, the longer the shutter is open, the more light is allowed to hit the sensor/film. This is great for night-time photography where you can let the camera (on a tripod) take long exposures. Controlling shutter-speed is also essential if you want to take high-speed photography like capturing action/sports shots.

Metering readings help you see how much light is available so you know what settings to shoot your camera with. There are handheld light meters, but mostly they are inbuilt to your camera. This is particularly useful when you are shooting in Manual mode. There are however different ways that the camera can interpret that light so there is:

· Centre-weighted metering – Light reading from whole scene then the centre

· Spot metering - reading from small part, usually the centre – highly backlit scenes

· Matrix metering – an average of lots of different zones

When you are shooting in digital you will have a choice in your format to shoot in. Jpeg is probably the format everyone is familiar. They have a small file size and any computer can read them. If you can then I strongly urge you to shoot in a RAW file format. This is like a digital negative. It stores much more information about your Jpeg – which is compressed. Despite the high file size, they allow you to correct aspects of your photo without ever permanently changing the original and ultimately better photos in the end. The downside is you normally need a special program, like Adobe Bridge to read the RAW format.

ISO is the how sensitive your film or sensor is to light. Changing the ISO is a big help in shooting low-light conditions, if you’re shooting hand held. A low ISO setting is 100 or 200 and a high setting is 1600. There is one drawback with shooting with a higher ISO, and it is one that puts most people off tinkering with it. When you shoot with a higher ISO, it makes your photos suffer in quality; the photos will be ‘grainy’ or full of ‘noise.’ There is however a certain style that some people like to shoot in, which produces grainy photos, for a certain effect. This goes against what the majority avoid because most people want clean crisp sharp photos. Fortunately for digital cameras you can add (or remove) noise in your image processing, but go authentic, with high ISO film and see what results you get. I direct you to this youtube video which can explain ISO visually http://www.youtube.com/watch?v=fPbuK24VL0Y&playnext=1&videos=TL4qFQZKk1M&feature=mfu_in_order

The eye is so clever that it adjusts to whatever situation it is in. The camera is not so advanced so you have to compensate the white balance in the scene. White balance depends on the ‘temperature’ of the light source and it can be adjusted to show true colours of a scene or alternatively be used to achieve a particular mood. Use auto white balance or change it manually, depending in what situation you are in. For example if you are taking pictures in the snow you can make she scene look more blue and cold by adjusting the white balance setting. Advanced, or professionals sometimes use a ‘Gray Card’ as a reference to control the white balance in a scene. If you’re shooting film you can correct white balance by using filters. One more benefit of shooting in RAW is that you can choose your white balance later. There is a really good in depth guide to WB here http://www.cambridgeincolour.com/tutorials/white-balance.htm

Focusing the camera is paramount to getting your subject sharp, but the majority of the time on digital this will be automatic. If you are shooting manually, then really all I can say is double check that the thing you want in focus – that really is in focus. Shooting in with manual focus can be really useful in instances where you’re taking lots of photos quickly of the same thing and you don’t want to waste time refocusing, or when shooting at night when your camera can’t see anything to focus on. My one crucial piece of advice is: make sure a person’s eyes are always in focus.

Image processing is a necessary part of photography, as much as it is time-consuming. For film you have the dark room, where you can perfect your photo to the way you want it. Dark room is a whole session or two by itself so I’m not going to talk about it here. What I will say is that some people are reluctant to process there images digitally because they believe then their images will be somehow be spoiled or make the photo not real. The truth is that ever since film has been invented, images have been tweaked in the dark room and digital image processing is no different. Ansel Adams onces said ‘the negative is the equivalent of the composer's score, and the print the performance.’ I think perhaps the for the majority of people it’s necessary to find a balance you are comfortable with, by finding how you can get the best out of your photos without making them become too unrecognisable from the original. There are of course people who love to create the pictures that are completely unrealistic, but they are an extreme.

Adobe Photoshop is probably what everyone knows as to be the software for image editing. It is hugely powerful and can do so many things – but it’s quite often very difficult to feel like you’re good at using Photoshop. I’d recommend Adobe Lightroom, it’s specifically designed for processing your photos quickly and easily, it’s top quality. Get it (or any Adobe product) while you are a student because you get something like 80% off the price. The free product I’ve heard about is called GIMP, http://www.gimp.org/ - A strange name, but it does the job.

So now you have your camera, and you have the lens you want. The next thing you probably need to look at you accessories. They’re not something that you go out and buy all at once, but something that you acquire over time. There are certain accessories that you will probably never need. I’d say one of the most important accessories is the tripod. You can get cheap tripods or nice expensive ones, but the important thing is to have one of some kind, that can help you take photos at night, or merely group shots (that you want to be in too!) Filters help you take photos in different conditions and they attach to the front of your camera and can be really useful – particularly with landscapes. Remote shutter releases help you take really long exposures. A Flashgun is awesome to use, really makes a difference than using your on-camera-flash, you have much greater control about your lighting. For professionals Studio lights are crucial to portrait photography, kits can be pretty expensive though.

Lastly I’d like to direct you to some further resources that can come in handy when you want to find more about photos

· www.flickr.com

· Digital photographer http://www.dphotographer.co.uk/

· The Guardian -http://www.guardian.co.uk/artanddesign/photography

· http://www.dpreview.com/

I think that concludes the general background to photography, I’ve no doubt missed something because there is simply so much. Learning all this is the first step – the next is to actually go out and take photos.

Sunday 3 October 2010

Session 1 - Colour Photography

So, for the first session I wanted to talk about something different, something that you may never have thought about before, but had certainly taken for granted. What's more I wanted to make sure that it was not something too technical, because all that will be covered in due course- and this was the introductory session after all.

What I find interesting is that the colour format is everywhere. It is so very easily accessible in the modern day. Whether you are walking past a billboard or reading a magazine, colour photographs are everywhere. Now, I'm not discounting the popularity of black and white photography that exists today, but colour is here,there and everywhere. It just seems so natural, because its showing our eyes can see, or a version of it.

But perhaps we should spare a thought for those people who innovated and developed ('scuse the pun) the technique of colour photography, in a world where everything was documented in black and white. So the first colour photograph was taken by James Clark Maxwell in 1861, which is known as the 'Tartan Ribbon' which you can see here:


It's not even a tartan ribbon, but I suppose that only demonstrates that idea of colour photography was in its infancy. James Clark Maxwell was well ahead of his time. He used the colour separation method, whereby he took 3 photos, with 3 different filters. One red, one blue and one green. The colour photograph was a projection of all 3. Genius!

In the coming years various innovators utilised different methods to produce their early colour photographs. Some where 'additive' and some where 'subtractive.' I can't say I properly understand how they worked when I read up about them. One of these innovators was Louis Arthur Ducos du Hauron, and apart from having an awesome name he took this photo using the subtractive method, in Agen, France, 1877:

It is astonishing to think that this photo was taken over 130 years ago, and knowing france, the landscape probably looks exactly the same today!

Despite these advances, colour photography was out of reach for the majority of photographers, and on top of that the amount of time in the dark room processing these photos must have been immense.

Another of these early photographers was Sergey Prokudin-Gorsky, who was funded by Tsar Nicholas II to photograph Russia in the early 20th Century.

Here you can see the process by which the eventual colour photograph resulted.
Now I was truly astonished at the photos that I saw in the full set. Seeing such photos from the early 1900s added a new dimension and appreciation of what the world was like that time - or certainly Russia at the very least. I strongly urge you to take a look this collection of photos, because they truly are stunning

http://www.boston.com/bigpicture/2010/08/russia_in_color_a_century_ago.html

There is one other notable person that I'd like to introduce you to and that is Albert Kahn. What he did was send out half a dozen photgraphers around the globe to document all the peoples of all different cultures. From France to Egypt to Japan, they really succeed in portraying the diversity of the world at that time.


Between 1909 and 1931 over 50 countries were documented - and the result was a collection of 72,000 photographs. The collection was nevery widely recognised but recently a selection has been published as the 'Wonderful World of Albert Kahn.' Here's the website if you want to check out more photos (look at the autochrome section)

http://www.albertkahn.co.uk/index.html


It wasn't until 1935 that the real revolution had begun. Who do we thank? Kodak! It was the Kodachrome which was invented by Leopold Godowsky and Leopold Mannes. It has been said that colour film was invented by God and Man after their names. A year later, in 1936 the 35mm colour format was available, and from then on the rest is history. Well, isn't everything?!
Anyway, from then on, Colour film has produced some of the most amazing photographs ever taken, however the format has been engulfed by the Digital format. Kodachromes were long in decline and after 74 years, the last roll of film was manufactured, used and developed. There is something quite poetic and distinctly sad that one of the last rolls of Kodachrome was used to shoot an Indian Tribe on the verge of extinction. This has been documented by National Geographic, and I believe it will be in an issue out some time next year. Read more about it here:

http://www.kansas.com/2010/07/14/1403115/last-kodachrome-roll-processed.html


When modern digital camera technology was first produced, photography entered a new era, where photography available to more people than ever before. A lot of the time you only need phone - with a camera on it. Colour photography is available at your fingertips at an instant. A far cry from the lengthy process of the early photographic experimenters. Even Polaroid cameras are being produced once again after a (silly) abscence.

Perhaps what you can take away from reading this is a deeper appreciation for the abilitily to shoot in colour, for you to try and look for the vividness of colour in everyday day life, and last of all, to appreciate how amazing the past looks in colour.

Dan